Your shopping cart is empty!

Call Us on 01243 200789
Shopping Cart
0 item(s) - £0.00
Hello! you can shop and browse as a guest or login.
Categories


Featured


CE5 clearomiser use and care
NiSmoke dual coil clearomiser:
PDF download of CE5 clearomiser care
Your CE5 clearomiser by NiSmoke is a dual coil unit manufactured by Innokin, and is designed to have the coils easily replaced. The coils should be of the same type and dimensions and are available on the NiSmoke website (www.nismoke.co.uk) .
General maintenance:
If you get a ‘bubbling’ noise when using the clearomiser or if you overfill it you have got liquid in the centre air passage. Remove the clearomiser from the battery, and using a paper towel or similar over the end of the clearomiser where it screws into the battery, blow through the mouthpiece – this will force liquid out of the air passage. Clean the contacts as in the next paragraph.
If your clearomiser stops working, make sure the contacts are clean. Clean the battery terminal inside the collar where it screws onto the clearomiser with a kitchen paper towel or similar, and do the same with the clearomiser end where it screws into the battery.
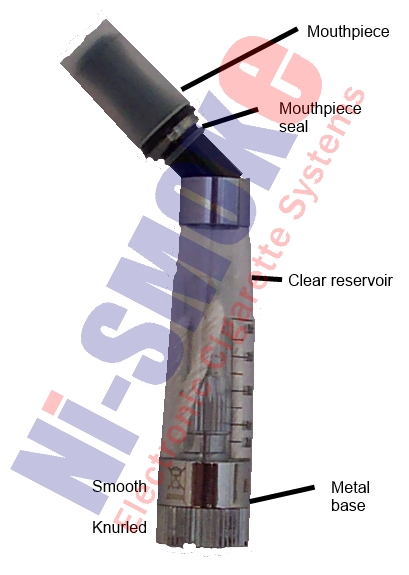
If your clearomiser is leaking at the bottom, it has most likely been strained (bent) by putting it in a pocket or dropped. This can be checked in two ways:
- If the top seal of the clearomiser (where the mouthpiece seats) is off centre, or
- If a groove is present between the base of the reservoir and the metal base (Run a fingernail up the clearomiser and you will feel a groove between the metal base and the plastic).
The plastic reservoir has been unseated from the base and needs to be pushed firmly back into the base. Please do this without the battery being attached as this can be damaged by the force needed to reseat the clear reservoir).
Reasons to replace the vaporiser/coil
- The clearomiser stops working – this is due either to a dirty contact (see maintenance) or a burned out coil.
- The liquid starts tasting burned.
- The liquid changes colour in the reservoir after filling.
- The battery flashes 3 times in quick succession when you try to use the clearomiser (shorted coil).
How to change the coil
PDF download of CE5 coil change instructions
Do not be afraid of this – it is actually a very easy job, and if you can screw the clearomiser onto the battery it is really no more complex than that !
Empty the liquid in the clearomiser (otherwise it gets really messy !)
Unscrew the mouthpiece as if you were going to refill the clearomiser
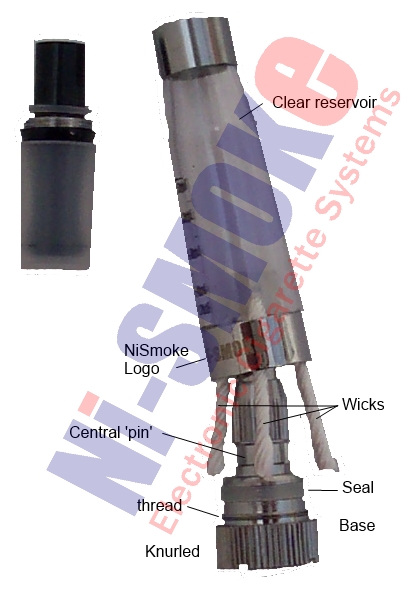
Hold the knurled (ridged) piece of the metal base and unscrew the plastic reservoir – the thread is between the knurled part and the smooth part of the metal base
You will now be able to access the coil assembly. This is the centre ‘pin’ of the clearomiser.
Unscrew the coil assembly by holding the knurled part of the base and unscrewing the knurled part of the coil assembly
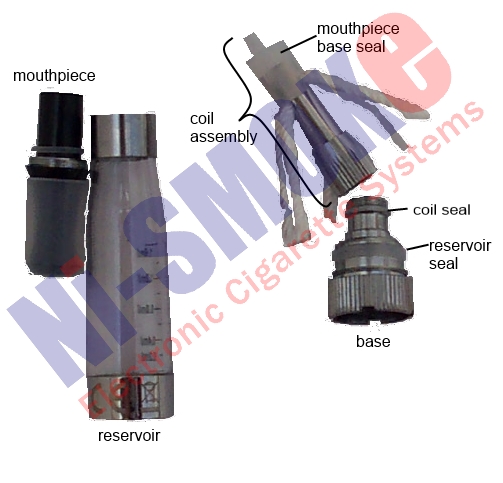
Open the new replacement coil and screw it into the base, ensuring the coil seal is undamaged and the wicks are not trapped in the threads.
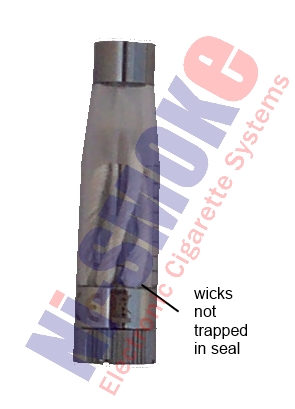
Make sure the wicks (strings) are not trapped between the reservoir seal on the base, gently slide the reservoir onto the base whilst rotating the reservoir clockwise (to help avoid trapped wicks)and screw on the reservoir
Refill and you’re away !
Information
Customer Service
My Account
We accept the following payment methods :
NiSmoke © 2026